RF Online Server (Bellato Strikes Back)

Features:
Ever wanted RF Online server Full package:
http://rapidshare.com/users/CJOBJW 1) Installation RF Server 2.2.3 2) Requirements Operating system: 64 Bit OS (recommend you Windows Server 2003 64 bit) work on Windows 7 64bit for HOME server Ram: 8 Giga minimum Microsoft SQL server (Microsoft SQL Server 2005) RF Online 2.2.3 Server Webserver for Emulate your Launcher updater (Using Appserv network) RF Online 2.2.3 Client (can be downloaded from here> [url] http://www.playrf.eu [/ url]) 3) Database Installation Install MSSQL server 2005 Creating a database: Start the MSSQL query, create a database BillCruxRF, RF_User and RF_WORLD_NOVUS Set and restore databases from files. Configure ODBC for MSSQL (server exe> MSSQL) 1. Click Start, select Administrative ToolsData Sources (ODBC), go to the tab [User DSN] and click [ADD] Select SQL Native Client (2005 MSSQL) [IMG] http://xmages.net/out.php/i286225_.JPG [/IMG] [IMG] http://xmages.net/out.php/i286226_.JPG [/IMG] Test the database connection and do the same for RF_User and RF_WORLD_NOVUS 4) Configure Server Exe / Ini a) Account server Find AccountSystem.ini Code [Database] AccountDB_Machine = 127.0.0.1 AccountDB_Name = RF_User [System] NationCode = US [DB_INFO] IP = 127.0.0.1 Port = 1433 DSN = BillCruxRF DBName = BillCruxRF Acc = sa PW = password [Service] MaxAccountNum = 100000 [World] WorldSet_Num = 1 ServiceSet_Num = 1 Name0 = Novus Address0 = 127.0.0.1 DBName0 = RF_WORLD_NOVUS Type0 = 0 [/ CODE] b) Login Server Find LoginSystem.ini [CODE] [Account] AccountAddress = 127.0.0.1 [System] NationCode = CN [CHECK ADDRESS] CHECK = TRUE [LOG] AUTH_LOG = TRUE [World] Lim World Num = 7 DB Push Job = 0 [BILLING] Check = FALSE BillingCode = 78 [MOTP] Service = TRUE HostName = 127.0.0.1 HostIP = 127.0.0.1 URLPath = / MOTPValidation / ValidationServlet Port = 12380 [IP Address Filter] FilterNum = 1 Filter0 = 192.168.20.0 FilterRange0 = 255 [UserCountDisplyLimit] Limit0 = 5000 Limit1 = 12000 Limit2 = 27000 [CHI_BILLING] Addr = 127.0.0.1 Port = 1433 DBName = BillCruxRF ACC = sa PW = password Run the Query Code USE [RF_WORLD_NOVUS] GO /****** Object: Table [dbo]. [Tbl_battletournament] by Magenik Script Date: 06/19/2009 16:22:48 ******/ SET ANSI_NULLS ON GO SET QUOTED_IDENTIFIER ON GO SET ANSI_PADDING ON GO CREATE TABLE [dbo]. [Tbl_battletournament] ( [CharacterSerial] [int] NOT NULL, [CharacterName] [varchar] (17) NOT NULL, [BattleWinGrade] [tinyint] NOT NULL, CONSTRAINT [PK__tbl_battletournament] PRIMARY KEY CLUSTERED ( [CharacterSerial] ASC ) WITH (PAD_INDEX = OFF, STATISTICS_NORECOMPUTE = OFF, IGNORE_DUP_KEY = OFF, ALLOW_ROW_LOCKS = ON, ALLOW_PAGE_LOCKS = ON) ON [PRIMARY] ) ON [PRIMARY] GO SET ANSI_PADDING OFF GO Run this script Code USE [RF_WORLD_NOVUS] GO /****** Object: Table [dbo]. [Tbl_ReservedGuildBattleInfo] by Magenik Script Date: 06/19/2009 18:59:56 ******/ SET ANSI_NULLS ON GO SET QUOTED_IDENTIFIER ON GO CREATE TABLE [dbo]. [Tbl_ReservedGuildBattleInfo] ( [ID] [int] NOT NULL, [P1GuildSerial] [int] NOT NULL, [P2GuildSerial] [int] NOT NULL, [MapID] [int] NOT NULL, [Number] [tinyint] NOT NULL, CONSTRAINT [PK_tbl_ReservedGuildBattleInfo] PRIMARY KEY CLUSTERED ( [ID] ASC ) WITH (PAD_INDEX = OFF, STATISTICS_NORECOMPUTE = OFF, IGNORE_DUP_KEY = OFF, ALLOW_ROW_LOCKS = ON, ALLOW_PAGE_LOCKS = ON) ON [PRIMARY] ) ON [PRIMARY] GO  Download and run [url] http://dump.ru/file/2937934 [/ url] or run this script [CODE] INSERT INTO [dbo]. [Tbl_economy_history] ([Serial], [Updatedate], [B_Dalant], [B_Gold], [C_Dalant], [C_Gold], [A_Dalant], [A_Gold], [ManageValue], [ B_MineOre1], [B_MineOre2], [B_MineOre3], [C_MineOre1], [C_MineOre2], [C_MineOre3], [A_MineOre1], [A_MineOre2], [A_MineOre3], [B_CutOre1], [B_CutOre2], [B_CutOre3], [C_CutOre1] , [C_CutOre2], [C_CutOre3], [A_CutOre1], [A_CutOre2], [A_CutOre3]) VALUES (20060512, '2006-05-02 15:30:54.000 ', 0.0, 1.0, 0.0, 1.0, 0.0, 1.0, 1000, 0.0, 0.0, 0.0, 0.0, 0.0, 0.0, 0.0, 0.0, 0.0, 0.0 , 0.0, 0.0, 0.0, 0.0, 0.0, 0.0, 0.0, 0.0) go INSERT INTO [dbo]. [Tbl_economy_history] ([Serial], [Updatedate], [B_Dalant], [B_Gold], [C_Dalant], [C_Gold], [A_Dalant], [A_Gold], [ManageValue], [B_MineOre1], [B_MineOre2], [B_MineOre3], [C_MineOre1], [C_MineOre2], [C_MineOre3], [A_MineOre1], [A_MineOre2], [A_MineOre3], [B_CutOre1], [B_CutOre2], [B_CutOre3], [C_CutOre1], [C_CutOre2 ], [C_CutOre3], [A_CutOre1], [A_CutOre2], [A_CutOre3]) VALUES (20060513, '2006-05-13 15:30:54.000 ', 0.0, 1.0, 0.0, 1.0, 0.0, 1.0, 1000, 0.0, 0.0, 0.0, 0.0, 0.0, 0.0, 0.0, 0.0, 0.0, 0.0 , 0.0, 0.0, 0.0, 0.0, 0.0, 0.0, 0.0, 0.0) go INSERT INTO [dbo]. [Tbl_economy_history] ([Serial], [Updatedate], [B_Dalant], [B_Gold], [C_Dalant], [C_Gold], [A_Dalant], [A_Gold], [ManageValue], [B_MineOre1], [B_MineOre2], [B_MineOre3], [C_MineOre1], [C_MineOre2], [C_MineOre3], [A_MineOre1], [A_MineOre2], [A_MineOre3], [B_CutOre1], [B_CutOre2], [B_CutOre3], [C_CutOre1], [C_CutOre2 ], [C_CutOre3], [A_CutOre1], [A_CutOre2], [A_CutOre3]) VALUES (20060514, '2006-05-14 15:30:54.000 ', 0.0, 1.0, 0.0, 1.0, 0.0, 1.0, 1000, 0.0, 0.0, 0.0, 0.0, 0.0, 0.0, 0.0, 0.0, 0.0, 0.0 , 0.0, 0.0, 0.0, 0.0, 0.0, 0.0, 0.0, 0.0) go [/ CODE] [COLOR=DarkOrange] If an error with CashShop You must remove hranyashuyusya procedure [COLOR = "LemonChiffon"] Prc_RFONLINE_Use [/ COLOR] and run it [url = http://dump.ru/file/2941764] Download file Prc_RFONLINE_Use.rar [/ url] Add a line running [COLOR = "LemonChiffon"] alter_tblRF_ItemOrderLog.sql [/ COLOR] which mozhnoskachat here [url = http://dump.ru/file/2941765] Download file Alter_tblRF_ItemOrderLog.rar [/ url] BillCruxRF Fix Download Fix Putting everything turns [URL = http://project.mmorpg-devs.com/board....og.rar] FIX # 1 [/URL] [URL = http://project.mmorpg-devs.com/board....se.rar] FIX # 2 [/URL] [URL = http://project.mmorpg-devs.com/board....1-.rar] FIX # 3 [/URL] [URL = http://project.mmorpg-devs.com/board....x-.rar] Fix # 4 [/URL] To start kontrolservera you need to rename the folder Initilize in Initialize (maxocculta) [COLOR =White] The structures for the server [/COLOR] [URL=http://dump.ru/file/2937522"] download [/URL] PHP / Web Emulation For Launcher Requirements: 1. Apache Server: AppServNetwork - AppServ 2.5.9 & 2.4.9 with Zend Optimizer AddOns Released! 2. Open ports TCP: 80 - 8080 -10007 INSTALLATION: 1.Ustanovite Appserv on drive C 2. Download it download 3.Ostanovite working Apache server 4. Navigate to the folder C: \ AppServ \ Apache2.2 \ conf [/ COLOR] 5. Edit httpd.conf using the information from paragraph 2 6. Copy rf-server.conf from paragraph 2 in the [COLOR=White] C: \ AppServ \ Apache2.2 \ conf 7. Copy all the www folder of paragraph 2 in the C: \ AppServ \ www 8. Edit the rf-server.conf using its IP 9. Edit update.dll using Notepad in the C: \ AppServ \ www \ rfclient_update \ simply changing IP on your 10. Edit tLPServerInfo.dat use information about your server at [COLOR = "White"] C: \ AppServ \ www \ rfclient_update \ update \ update1 [/COLOR] 11. Make your Launcher with your IP and put it in [COLOR = "White"] C: \ AppServ \ www \ rfclient_update \ update \ Make_newRF [/COLOR] Hex RF.lc (you can rename it RF.exe or RF_Myserver.exe) Look for 192.168.1.1, and 192.168.1.1 replace all their IP, and then save it and rename it RF.lc then run NewCab.bat newRF.cab then copy and paste in the folder [COLOR = "White"] C: \ AppServ \ www \ rfclient_update \ update \ update718 [/ COLOR] and [COLOR = "White"] C: \ AppServ \ www \ rfclient_update \ update718 [/COLOR] 12. Start Apache 13. Use you make launcher credits : VinzGamer |
WARNING: SERVER FILES ARE NOT COMPLETE
There is some work that needs to get done in order to make the client connect to your server.
Drift City Private Server Files
The Download is under 21mb!
http://www.mediafire.com/?2yytz3mqkom
Drift City Private Server Guide
1)Make 5 New Folders called GameServer_Auth, GameServer_Game, GameServer_Area, GameServer_Lobby, and GameServer_BArea.
2) Copy and paste all files from the GameServer folder and paste it into every GameServer_* folder you created.
3) Go to all GameServer_* folders and change the ip addresses in connector.ini trafficagent_def.ini and zoneserverconfig.ini.
4) Change the database information in zoneserverconfig.ini (ExtraDBName ExtraDBUser ExtraDBPass. ExtraDBName must be skdbtw and ExtraDBUser must be SKID ExtraDBPass SKID)
5) Change GameServer_Auth's zoneserverconfig.ini information.
Set AuthOn=1 and ServerID=100
6)Change GameServer_Area's zoneserverconfig.ini information.
Set AreaOn=1 and ServerID=100
7)Change GameServer_Game's zoneserverconfig.ini information.
Set GameOn = 1 and ServerID to 100.
8)Change GameServer_BArea's zoneserverconfig.ini information.
Set BAreaOn = 1 and ServerID to 100.
9)Change GameServer_Lobby's zoneserverconfig.ini information.
Set LobbyOn = 1 and ServerID to 100.
MSSQL Part
1) Download and Install MSSQL 2008 with Tools ( http://www.microsoft.com/downloads/d...displaylang=en )
2) Open up SQL Server Management Studio (SSMS)
3)Create Database skdbtw ( Right click databases - new database )
4) Create user SKID with the password SKID ( right click security - new login )
5) Open up the main dc table (20080529_DC_TW_FULL_script) - File - Open - File - 20080529_DC_TW_FULL_script.sql
6) Execute it and refresh the database ( Right click databases - refresh )
7) Click the drop down boxes (database - tables) In tables, search for the table SKID_UNALISCOIN_CHG_LOG_TB
Right click it - Delete.
8) Download this sql script made by wesman2232 to fix a error without doing it manually.
http://www.mediafire.com/download.php?ydjemzue1ay
Open it and execute.
9) Then open UnAlisCoin_Test.sql and execute it too.
10) Now you are ready to run the files!
Needs to be run in this order:
Auth (GameServer_Auth/zoneserver.exe)
Game {GameServer_Game/zoneserver.exe}
Area (GameServer_Area/zoneserver.exe)
Traffic {GameServer_anything/trafficagent.exe}
Now you have completed setting up the server part of Drift City!
------------------------------------------------------------------------------------------------------------------
Credits:
RZ_Member ( Setting up like 3/4 of the files for the community, writing a tutorial/guide, readme )
wesman2232 ( Fixing error in executing UnAlisCoin_Test.sql, helping me in mssql )
zad67 ( Helping us setup the server files PROPERLY )
Iviso ( For releasing the files to RZ for FREE! )
Gaaaabg ( Posting a translation to zoneserverconfig.ini )
ProKiller002 ( Storage and help )
sari4ever ( Helping us for a long time )
ALL Testers ( Helping me fix errors in the files available for download - If there are any. )
All Downloaders! (I have gotten over 2000 downloads!)
Thank you all!
Download Microsoft SQL Server 2005 Express Edition.
- Run the Installer and follow it accordingly.
Download Microsoft SQL Server Management Studio Express
- Run the installer and follow it accordingly.
Download the Luna Online Server Files
- Extract them accordingly to where you want.
-- Go to your Luna Online Server Files/Dll Folder and run Register.bat
Download MHBinPacker
- Extract them accordingly to where you want.
-- Go to your MHBinPacker Folder and run Register.bat
Download OllyDbg
- Extract them accordingly to where you want.
Download the Luna Online Thai Client
- Run the installer and follow it accordingly.
Download Hex Workshop.
- Run the installer and follow it accordingly.
Optional
Download lunagamedb SQL (If you want 5 characters per account instead of 3)
- Extract them accordingly to where you want.
--
Open Microsoft SQL Server Management Studio Express.
- Right click on the item Database in the side pane.
-- Choose New Database...
--- For Database name put, Luna_Game
-- Open lunagamedb.sql for 5 Chracters on a account, or open lunagamedb00.sql for 3 characters on a account.
--- Press Execute
Notice: Ignore any SQL Errors.
The Error states that the database is missing tables and the stored procedures being created will not be able to be executed until the tables are present.
- Right click on the item Database in the side pane.
-- Choose New Database...
--- For Database name put, Luna_Member
-- Open lunamember.sql
--- Press Execute
Notice: Ignore any SQL Errors.
The Error states that the database is missing tables and the stored procedures being created will not be able to be executed until the tables are present.
- Right click on the item Database in the side pane.
-- Choose New Database...
--- For Database name put, Luna_Log
-- Open luna_logdb.sql
--- Press Execute
Notice: Ignore any SQL Errors.
The Error states that the database is missing tables and the stored procedures being created will not be able to be executed until the tables are present.
--
Open the RUN Dialog.
- Type, odbcad32
-- Submit
--- Click Add...
---- Select "SQL Server" from the list
----- Click Finish, When it asks for A Data Source Name, put "luna_gamedb".
------ Fill out the MSSQL Information Accordingly.
------- In the Drop menu for Default Database Choose "Luna_Game".
-------- Click Next until you are Finished.
--- Click Add...
---- Select "SQL Server" from the list
----- Click Finish, When it asks for A Data Source Name, put "luna_memberdb".
------ Fill out the MSSQL Information Accordingly.
------- In the Drop menu for Default Database Choose "Luna_Member".
-------- Click Next until you are Finished.
--- Click Add...
---- Select "SQL Server" from the list
----- Click Finish, When it asks for A Data Source Name, put "luna_logdb".
------ Fill out the MSSQL Information Accordingly.
------- In the Drop menu for Default Database Choose "Luna_Log".
-------- Click Next until you are Finished.
--
Go to your Luna Online Server Folder.
- Right click on "AgentServer.exe"
-- Chosoe to edit with Hex Workshop
--- Press "Ctrl+ f"
--- Search for GameSrv and replace it with your MSSQL Login User Name
---- Below that should be some text that says Luna, replace that with yout MSSQL User Password.
(Note: it is placed in the executable twice, both need to be replaced)
----- Save the Executable.
- Right click on "DistributeServer.exe"
-- Chosoe to edit with Hex Workshop
--- Press "Ctrl+ f"
--- Search for GameSrv and replace it with your MSSQL Login User Name
---- Below that should be some text that says Luna, replace that with yout MSSQL User Password.
(Note: it is placed in the executable twice, both need to be replaced)
----- Save the Executable.
- Right click on "MapServer.exe"
-- Chosoe to edit with Hex Workshop
--- Press "Ctrl+ f"
--- Search for GameSrv and replace it with your MSSQL Login User Name
---- Below that should be some text that says Luna, replace that with yout MSSQL User Password.
(Note: it is placed in the executable twice, both need to be replaced)
----- Save the Executable.
--
Go to your MHBinPacker Folder
- Start "MHBinPacker.exe"
-- Open the Open File Dialog
--- Navigate to your Luna Online Client/System Folder and open "settings.bin"
---- There should be 2 IP`s and a port Copy The Distribute Server IP Address to a notepad for later.
----- Change both of the IP Addresses to your IP, chanege the port to "16002"
------ Save the File
-- Open the Open File Dialog
--- Navigate to your Luna Online Client/System Folder and open "serverlist.bin"
---- There Should be a server name, a server port, and a server ip. I dont remember the order.
----- Change The Server Name to "YOUR SEVER NAME", change the port to "16002", Change the ip to "YOUR IP"
------ Save the File
-- Open the Open File Dialog
--- Navigate to your Luna Online Sercer/Serverset/0 Folder and open "ChannelInfo.bin"
---- Edit The Channel name According to how you want.
----- Save the File
--
Open your Luna Online Client Folder
-- Chosoe to edit with Hex Workshop
--- Press "Ctrl+ f"
---- Search for the IP address you got from the settings.bin File Earlier and repalce the ip with yours
----- Save The Executable
--
Go to your OllyDbg Folder
- Start "OllyDbg.exe"
-- Go to File -> Open
--- Navigate to your Luna Online Client Folder
---- Choose "LunaClient.exe"
----- Press OK/Open
------ In The CPU Window, Right Click
------- Select Search -> Search for All Refrenced Text Strings
-------- Right Click in the new Windows
--------- Select Search For Text
----------- UnCheck Case Sensitive, Ckeck Entire Scope
------------ Search for the String "You should not execute directly this file"
------------- Double Click onit, it will bring you back to the CPU Window
Should Look Like This
005D5104   . EB 1C          JE SHORT LUNAClie.005D5122
005D5106   . 50             PUSH EAX                                 ; /Style => MB_OK|MB_APPLMODAL
005D5107   . 68 48A99200    PUSH LUNAClie.0092A948                   ; |Title = "Error!!"
005D510C   . 68 14A99200    PUSH LUNAClie.0092A914                   ; |Text = "You should not execute directly this file!!
005D5111   . 50             PUSH EAX                                 ; |hOwner => NULL
005D5112   . FF15 E8DCB400  CALL DWORD PTR DS:[<&USER32.MessageBoxA>>; \MessageBoxA
--------------- In The Dialog, change the text "JNZ" to "JMP"
---------------- Click OK
----------------- Right Click in the CPU Window
------------------- Choose Copy To Executable -> All Modifications
-------------------- In The New Window, Right Click
--------------------- Choose to save file
--
Open your Luna Online Server/Serverset/0 Folder
-- Start "MakeServerList.exe"
You will need to make a Server List according to blow.
MAP_SERVER 2  YOUR_IP 18002  NO_IP NO_PORT
MAP_SERVER 12 YOUR_IP 18012  NO_IP NO_PORT
MAP_SERVER 13 YOUR_IP 18013  NO_IP NO_PORT
MAP_SERVER 14 YOUR_IP 18014  NO_IP NO_PORT
MAP_SERVER 15 YOUR_IP 18015  NO_IP NO_PORT
MAP_SERVER 16 YOUR_IP 18016  NO_IP NO_PORT
MAP_SERVER 17 YOUR_IP 18017  NO_IP NO_PORT
MAP_SERVER 18 YOUR_IP 18018  NO_IP NO_PORT
MAP_SERVER 19 YOUR_IP 18019  NO_IP NO_PORT
MAP_SERVER 20 YOUR_IP 18020  NO_IP NO_PORT
MAP_SERVER 21 YOUR_IP 18021  NO_IP NO_PORT
MAP_SERVER 22 YOUR_IP 18022  NO_IP NO_PORT
MAP_SERVER 23 YOUR_IP 18023  NO_IP NO_PORT
MAP_SERVER 24 YOUR_IP 18024  NO_IP NO_PORT
MAP_SERVER 25 YOUR_IP 18025  NO_IP NO_PORT
MAP_SERVER 26 YOUR_IP 18026  NO_IP NO_PORT
MAP_SERVER 27 YOUR_IP 18027  NO_IP NO_PORT
MAP_SERVER 28 YOUR_IP 18028  NO_IP NO_PORT
MAP_SERVER 29 YOUR_IP 18029  NO_IP NO_PORT
MAP_SERVER 30 YOUR_IP 18030  NO_IP NO_PORT
MAP_SERVER 31 YOUR_IP 18031  NO_IP NO_PORT
MAP_SERVER 32 YOUR_IP 18032  NO_IP NO_PORT
MAP_SERVER 33 YOUR_IP 18033  NO_IP NO_PORT
MAP_SERVER 34 YOUR_IP 18034  NO_IP NO_PORT
MAP_SERVER 41 YOUR_IP 18041  NO_IP NO_PORT
MAP_SERVER 42 YOUR_IP 18042  NO_IP NO_PORT
MAP_SERVER 51 YOUR_IP 18051  NO_IP NO_PORT
MAP_SERVER 52 YOUR_IP 18052  NO_IP NO_PORT
MAP_SERVER 53 YOUR_IP 18053  NO_IP NO_PORT
MAP_SERVER 54 YOUR_IP 18054  NO_IP NO_PORT
MAP_SERVER 55 YOUR_IP 18055  NO_IP NO_PORT
MAP_SERVER 91 YOUR_IP 18091  NO_IP NO_PORT
MAP_SERVER 92 YOUR_IP 18092  NO_IP NO_PORT
MAP_SERVER 93 YOUR_IP 18093  NO_IP NO_PORT
MAP_SERVER 94 YOUR_IP 18094  NO_IP NO_PORT
DISTRIBUTE_SERVER 0 YOUR_IP 16001 YOUR_IP 16002
AGENT_SERVER 0 YOUR_IP 17001 YOUR_IP 17002
--- Save as "serverlist.msl"
--
Open your Luna Online Server Folder
- Start "DistributeServe.exe"
-- Start "MapServer.exe" with the following Syntaxes, how you choose to do them is up to you.
mapserver.exe 2
mapserver.exe 12
mapserver.exe 13
mapserver.exe 14
mapserver.exe 15
mapserver.exe 16
mapserver.exe 17
mapserver.exe 18
mapserver.exe 19
mapserver.exe 20
mapserver.exe 21
mapserver.exe 22
mapserver.exe 23
mapserver.exe 24
mapserver.exe 25
mapserver.exe 26
mapserver.exe 27
mapserver.exe 28
mapserver.exe 29
mapserver.exe 30
mapserver.exe 31
mapserver.exe 32
mapserver.exe 33
mapserver.exe 34
mapserver.exe 41
mapserver.exe 42
mapserver.exe 51
mapserver.exe 52
Mapserver.exe 53
mapserver.exe 54
mapserver.exe 55
mapserver.exe 91
mapserver.exe 92
mapserver.exe 93
mapserver.exe 94
Notce: Ignore errors "Cannot Connect to MS Server".
The Monitor Server is not currently available due to a compressesion or encryption on the ".tmp" file that is supposed to be included. The ".tmp" file contains some SQL Connection Information. As to how to edit the ".tmp" file is not publicly known. If the file is present in the Server Folder all the server files will try to use it. Currently recommended to remove the file if present. If anyone has information to editing the ".tmp" file please post it. It is required to run the Monitor Servers.
--
Download the Apache HTTP Server
- Run the installer and follow it accordingly.
-- Install it to the Path "c"/web/apache"
Download the PHP Server
- Run the installer and follow it accordingly.
-- Install it to the Path "c"/web/php"
--- Apache`s configuration path is "c/web/apache/conf"
---- Click on Extensions in the features panel Choose to install all.
In the Notifications area of your task-bar should be a Apache icon, click it
-- Choose Restart Apache
Download The Registration Script
- Extract it to "c/web/apache/htdocs"
-- open the file "config.php" inside the "include" folder
-- Fill out your MSSQL Server and Login Infom then Save the file.
Create a Account at ReCaptcha
- Upon Completion you will receive a public and a private key
-- Open the file "Register.php" inside the "htdocs" folder
--- Search for "$publickey = "6Ld6kAYAAAAAAInr_9SvDx5ZEof1i9Zy9wDthKHw";"
---- Replace whats in the "" with your Public Key
--- Search for "$privatekey = "6Ld6kAYAAAAAANuPFflVV7lpKsXCZQrdFDz8BiWt";"
---- Replace whats in the "" with your Private Key
----- Save File
------- Download The ReCaptcha lib PHP file
-------- Extract the php file to "c/web/apache/htdocs/include"
--
Go to "http://YOUR_IP/Register.php" to create a account.
--
Go to you Luna Online Client Folder and Start LunaClient.exe
- Select Server
-- Login
Notice: This Guide was made based off of memory, I have not touched Luna Online in over 2 months.
Credit : ragezone.com ... thanks vinz ...
Mau Cara Buat Private Server Dengan tutorial video ?? Follow blog dolo .. baru koment di bawah untuk minta ..
Hey Guys Its CoolGirl =)
I Gathered up alot of files for you guys if any of you want to start making your test servers =).
Ill post all of the links first:
The voice guide got a little out of sync with the video. But it still is good
English Tutorial + Voice Guide
Linknya gan ..
VMware:
VMware.Workstation.6.5.1.Build.126130.part1.rar
VMware.Workstation.6.5.1.Build.126130.part2.rar
VMware.Workstation.6.5.1.Build.126130.part3.rar
VMware.Workstation.6.5.1.Build.126130.part4.rar
VMware.Workstation.6.5.1.Build.126130.part5.rar
SQL 2000 Sp4:(not required)
MSSQL 2000.part1.rar
MSSQL 2000.part2.rar
MSSQL 2000.part3.rar
MSSQL 2000.part4.rar
Server:
Ubuntu.exe.001
http://www.mediafire.com/?e21tjjqjmml
Ubuntu.exe.003
DataZhuXian(MSSQL):
DataZhuxian.sfx.part1.exe
DataZhuxian.sfx.part2.rar
DataZhuxian.sfx.part3.rar
DataZhuxian.sfx.part4.rar
DataZhuxian.sfx.part5.rar
this gets attached to it =)
Data.zip
Game ClientV1.0:
Free File Hosting Made Simple - MediaFire
GM Tools(for account making, add jaden)
ZhuxianGM.exe
Winscp(ftp and uploading program):
WinSCP :: Free SFTP and FTP client for Windows
I suggest using programs like 7z to unzip all this stuff. Its easier.
http://hjsplit.en.softonic.com/download#pathbar
or hjsplit
credits to coldnex
Okay Now Steps to making server(basic steps, if you need help post below =D)
1. You need to set up your vmware and Set VMnet 3, Go to your network connections and make sure you set the ip for VMnet3 adapter to "192.168.200.102"
2. Start Ubuntu(the password to login is root, pass@123") And make sure on VMware settings it is set to VMnet 3. Your ip in ubntu will be 192.168.200.100 witch is pre set for you =).
3. Start DataZhuXian(MSSQL). You will have to go in there and attach the 2 data files from above(Good Detail in the video on how to get to it!)
4. You are going to have to change your MSSQL(DataZhuXian) Ip to "192.168.200.101"(get the pattern? 192.168.200.100, 192.168.200.101, 192.168.200.102 with the internet thingy's)
5. Reset both the Ubuntu and the DataZhuXian. Your going to want to login with winscp(posted above) And go to "usr>rain>gamed>config> and grab the gshop.data and make sure you copy that to your client(so you have functional cash shop) In your Client it should go in TruTien>element>data(just replace it).
6. Ping Test!!
In Your Ubuntu type "ping 192.168.200.100"(unbuntu)
Next type: "ping 192.168.200.101"(database)
Next type: "ping 192.168.200.102"(your computer)
7. If all worked your good to go! Start the server. The Command is either ./start , or ./start01 . You can add more realms( I DONT RECOMEND IT) By Doing ./start02 after your game is started!
8. Make sure in your client to edit your server text list(this way you can connect to your game. In your text list add this
" ServerName 29000:192.168.200.100 11"
--withought those quotes.
(TruTien>element>userdata>server>serverlist.txt)
9. You Need to make an account to login =O Do this with the GM Tools i included in this short tutorial. Its all viet/chinese and confusing in the beginning but in the video tutorial it is explained much much better(for visual learners).
10. You should be able to open your client and login.
11. If you are having troubles with anything just post below and ill see what i can do to help you =)( BTW this is all on local host!)
All Credits go to my Friend Fancy09 who helped me make this =)
MOHON UNTUK TIDAK DIPERJUALBELIKAN HANYA UNTUK KOLEKSI SENDIRI
[InfoAboutServer&Game]
Game name: Seal Online
Server type: Emulator
Server database: MySQL
TOOLS:
Mysql server 5 cari disini
navicat cari disini
Xampp Cari disini
Cara Install nya bisa lihat video dari bang ayief klik disini
| credit to bang ayief @ snutz.us |
download file server
mirror file server
Liat video bang ayief disini
| credit to bang ayief @ snutz.us |
download client seal china part 1
download client seal china part 2
download client seal china part 3
download client seal china part 4
download client seal china part 5
download client seal china part 6
download client seal china part 7
biar cepet pake rapidleech neh rskiller.net --->> TERNYATA RSKILLER-NYA DAH MATI DI HACK COBA MIRROR YANG BAWAH GAN
password client seal china: ragezone.comhttp://www.filefront.com/17147766/45...5-27.part1.rar
http://www.filefront.com/17147948/45...5-27.part2.rar
http://www.filefront.com/17147819/45...5-27.part3.rar
krack seal biar bisa Launcher ke server kita
liat video bang ayief disini
| credit to bang ayief @ snutz.us |
password buat semua tools dan video: klik disini| Tutor by ay1ef script server by omen aka G1G010 aka hackoza ( maaf kalo ada salah tulis huruf huahua) tutor awal dari www.ragezone.com masih banyak bugs dan bahasa **** ... nanti lah di benerin lagi |
ini HADIAH THR buat sealover yang ga pernah punya equip dewa...
mangga dicobian...
TESTED BY ME
update lainnya menyusul...nunggu sesepuh benerin dulu...
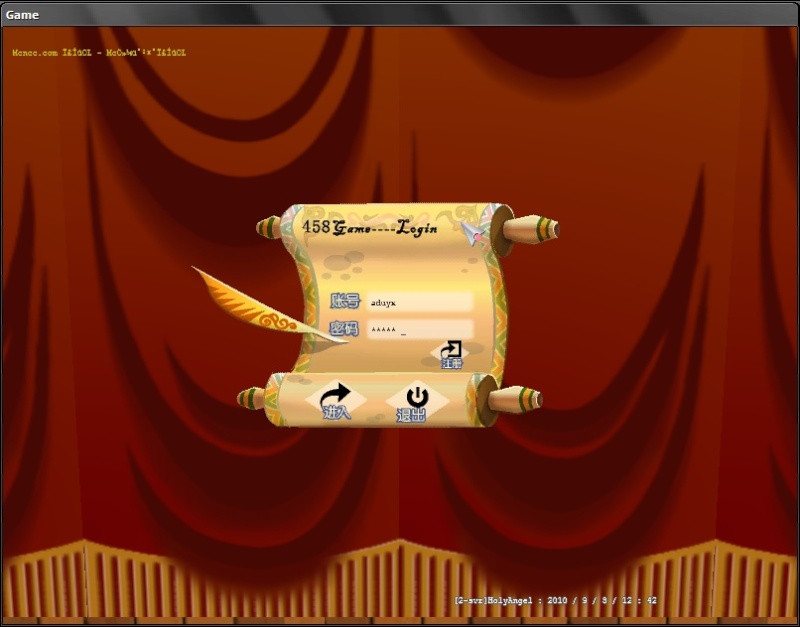 pas login nya ene... |
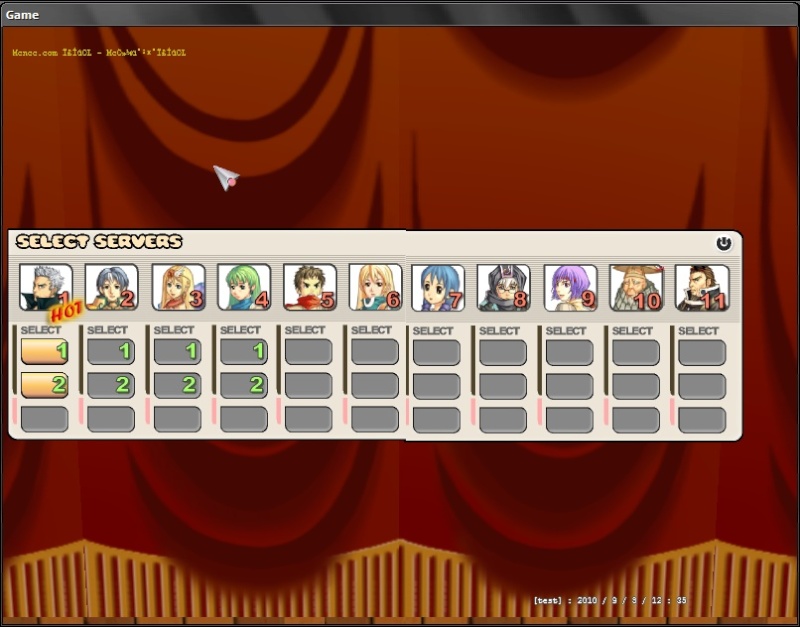 ini pas milih server...banyak yoo..tapi cuman 1 yg bisa.. |
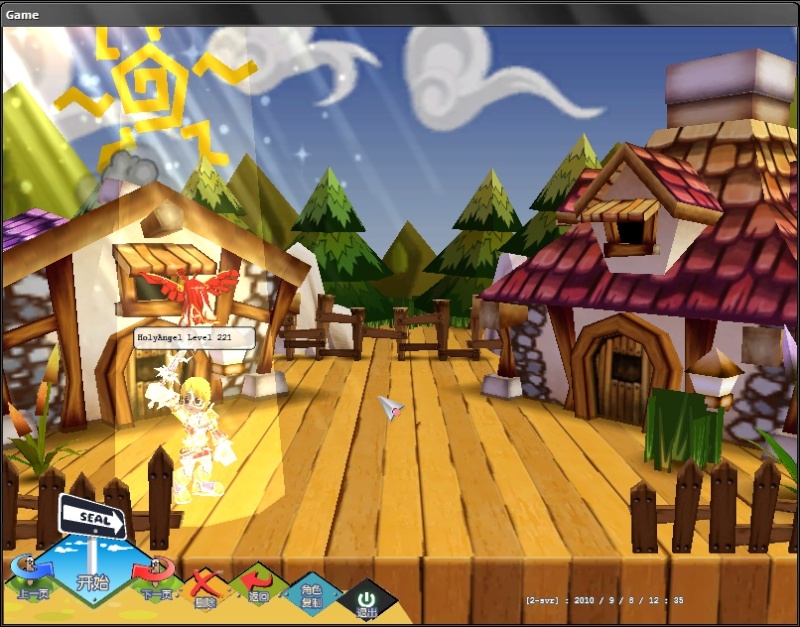 nahh ene char saya boss...hahaha |
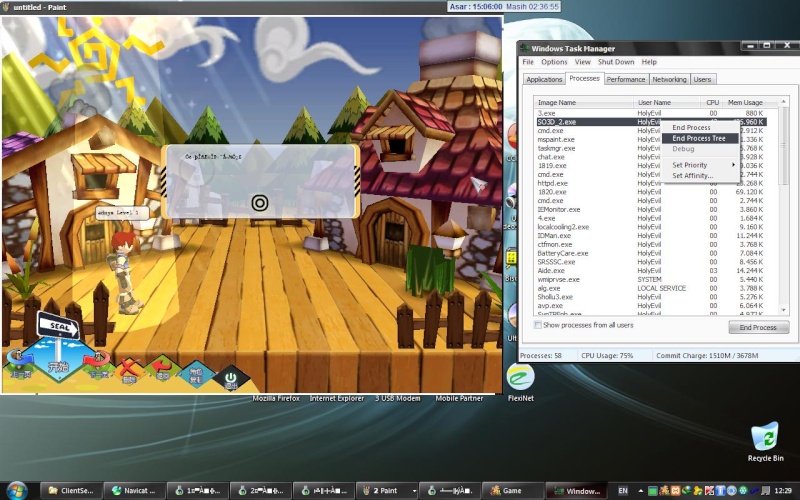 kalo pas milih char muncul kaya gambar ini, berarti belum konek ke host.. kalo ente ada LAN sambungin lahh terus setting IP nya samain yg di ascent-chatserver.conf , ascent-logonserver.conf ama WSDserver.conf kalo kaga ada LAN bikin Loopback adaptor terus setting kaya LAN biasa..gimana bikinnya loopback? neh linkna baca dari microsoft -klik here buat XP -klik here buat 7 |
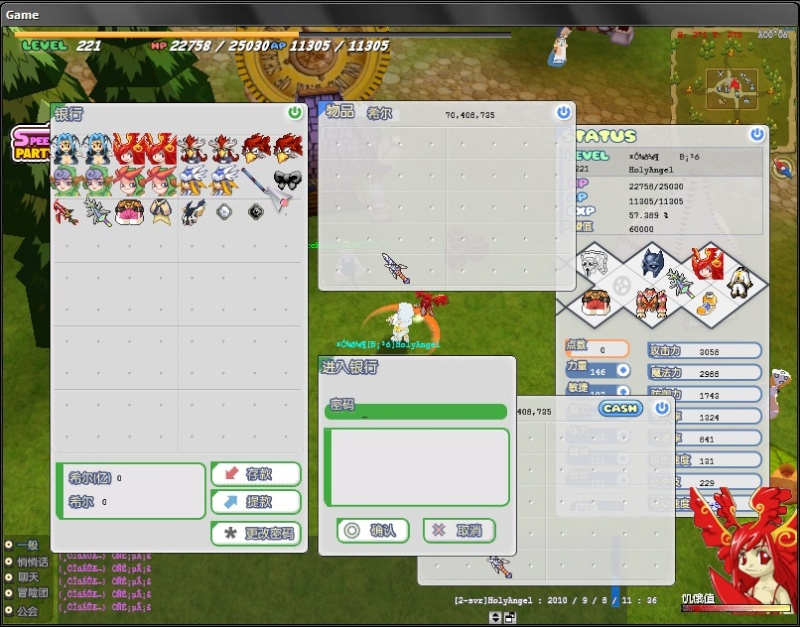 biar bisa dapet item/equip/pet sesuka hati kita silakan edit database inventory pake tools navicat.. hehe kren ya koleksi pet saya.. |
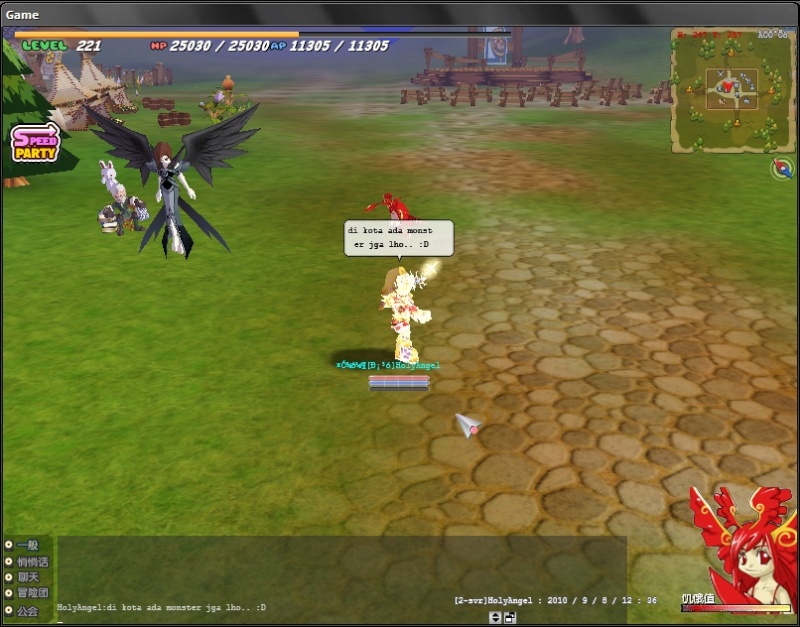 ada momon di kota Lime...coba ke map atas kota Lime yg ada BahBah ada OHM 2 biji lhooo..wkwkkw |
ini database char HolyAngel punya saya yg kek di picture diatas.. silakan disedot
CARA EDIT DATABASE inventory + itemID nya...
| guid = id (di table characters)(jadi liat di table character IDnya char yang kmu pake tuh brp misal "3" maka di "guid"(tabel invent = "3") item_id = (ganti sesuka hati misal 433=ruby) num = (++nya equip/pet/jumlah barang(sampah2)) misal kamu mau buat pet + 9 maka di item_id masukin ID petnya.. trus di num kasi angka "9" = Pet+9 num2 = ga ngerti apaan a0 sampai a3 = klo itemnya sampah(kaya giranium, pot, russty gear dll, maka a0-a3 nilainya "0"(nol) klo itemnya equip++/pet++ maka nilainya a0-a3 = "255" pos = posisi item di slot invent = dimuali dari angka 8 (slot 1) crc & szid = biasanya semua nilainya "0(nol)" waduh.. kata2nya ribet ya kk klo ada salah maap ya... *ampir lupa.. nih itemIDnya DOWNLOAD |
Release Seal offline Map Id
0 = zaid
2 = elim
4 = tempatnya Joan dan kawan2
5 = hilir sungai glasis
6 = tahun 315
7 = gunubg travia
8 = lime
10 = tambang clement lt 1
13~18 = madelin
15 = hutan cross , hilir sungai glasis
16 = kuburan bawah tanah
17 = hutan laywook barat
18 = kuil adel
19 = lembah travia ( tmpt beli golden shield )
20 = map sevis dalam perbaikan neh
 :
:21 = pelatihan beginner
22 = colloseum
24 = selatan poibus
25 = goa kematian ( kosong doang ga ada isinya )
26~42 = STUCK !
43 = lembah sikara
109 = diding luar lime
110 = hutan laywook timur
111 = hulu singai mimir
112 = daratan glasis
113 = danau cross
114 = barat red soil
115 = timur red soil
116 = Sevis
117 = utara poibus
118 = goa terlarang
119 = pulau terlarang barat
120 = pulau terlarang timur
124 = dimensi gelap
125 = dimensi api
126 = dimensi air
127 = dimensi kayu
128 = dimensi logam
129 = dimensi tanah
130 = dimensi cahaya
credit to yogaedan and me.ada 2 tipe GM
1. GM master [ bisa memproduksi item dan sebagai nya ] job 15
2. Sub GM [ tidak dapat membuat item ] job 7
1. masuk ke bagian Characters
2. di bagian JOb isi 15
Command GM
*item(spasi)nomor item
jadi misal gini
*item 4059
yang keluar tuh fly dragon+12
*item kodeitem [ contoh ketik *item 4059 ] kode item nya dari 1 sampai 11300 kurang lebih
*monster namamonster [ contoh ketik *monster piya ]
*move iduser [ contoh ketik *move 1 <--id no urut di table login ]
*kill_account
*kill_guild
teleport/pindah map tinggal ketik nama map nya [ contoh ketik 315 ]
by prans / http://celestiaseal.blogspot.com/2010/09/tutorial.html
TAMBAHAN COMMAND GM NEH BUAT PINDAH MAP
buat command GM
kan pada ga bisa toh pindah map pake command GM??
nah pake nama2 map ini
silahkan download via IDWS
edited**
*gives
 (di pake klo mau bikin item sampah aja :P giranium dll)


soalnya item yang di hasilkan jumlahnya 299.. sudah di coba di item equip pet senjata

di databasenya num= 299 (pantasan aja +0)wkwkkwkwkwkw
Gan .. Bagi Yang Mau Pengen buat private server Ran Sendiri ... Silahkan Bisa download client + server + tutorial with video .. easy tutorial
Cekidot .. Langsung Saja = Server + Video Tuts + Client With Mysql Database
Credit : vinzgamer.blogspot.com
Can't hear anything? Please try one of the player links.
Follow NetworkedBlog
My Facebook
Promosi Banner


Chit Chat